Images can be applied in different formats and sizes when creating mobile and web applications. If you think about how many application settings that can be, you start to understand how tedious and time-consuming the task of resizing images can be.
In this article, you will learn how to easily resize an image with React Native.
Prerequisites
To understand the concepts in this tutorial, a good knowledge of JavaScript and React is required.
You will also need:
- A free Cloudinary account: https://cloudinary.com/users/register_free.
- Node.js installed.
- Expo CLI installed.
- Expo app installed on an Android or IOS device.
- Sample images (see below for links).
The complete source code can be found here.
Getting started
First, you need to create a React Native starter project by navigating to the desired directory and running the below command in a terminal:
    npm install -g expo-cli
    expo init react_native_img && cd react_native_img
The command installs the Expo CLI on your machine, creates a React Native project called ‘react_native_img,’ and navigates into the project directory.
PS: The command will also ask to choose a template. Choose blank by pressing the Enter key.
Image sourcing for the gallery
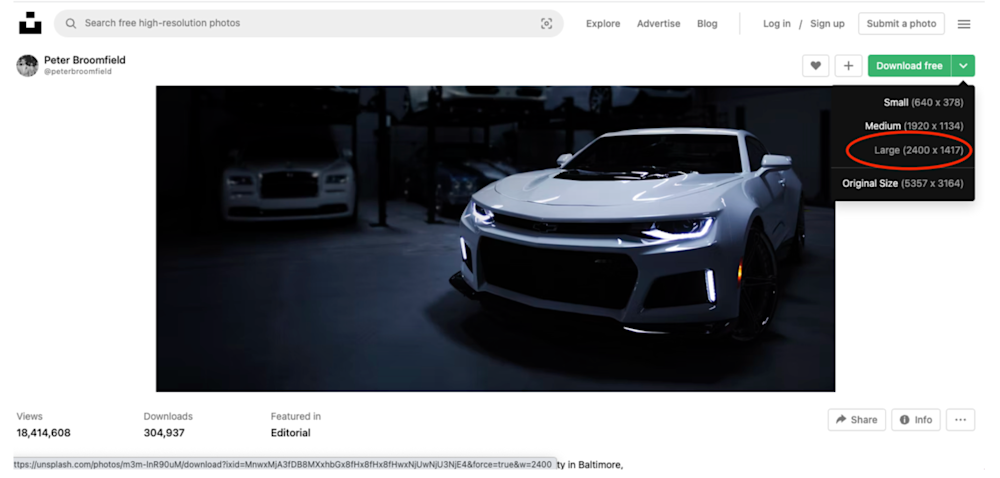
Next, you must download sample images for your gallery by navigating to the URLs below:
- Car_1 – https://unsplash.com/photos/m3m-lnR90uM
- Car_2 – https://unsplash.com/photos/YApiWyp0lqo
- Car_3 – https://unsplash.com/photos/eqW1MPinEV4
- Car_4 – https://unsplash.com/photos/3ZUsNJhi_Ik
Next navigate to the assets folder, create an images folder, and copy and paste the downloaded images into this folder.
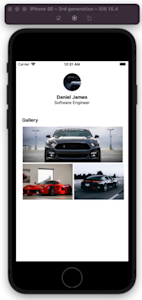
Creating a personalized gallery page
Now you’ll need to modify the App.js file to:
https://gist.github.com/Mr-Malomz/fff5926746b4565ecfb13a510bddeefa target=”_blank”
The snippet above:
- Imports required dependencies.
- Creates a markup to display a profile section and a gallery section.
- Uses StyleSheet – a React Native CSS-like support – to resize an image with React Native accordingly and add properties.
With that done, you can now start a development server using the following command:
‘Expo start.’Next, you must open the generated URL on a web browser and scan the barcode using the installed Expo app:
Challenges with this approach
- Application Performance: To get non-pixelated images, you must download the best option, which is usually a large file. The size affects the loading time and application performance.
- Scalability: If the business requirement changes at any time – for instance, a web and an API version of the application – you will be required to follow the same approach by manually downloading and copying to the project folder.
Upload once, use everywhere
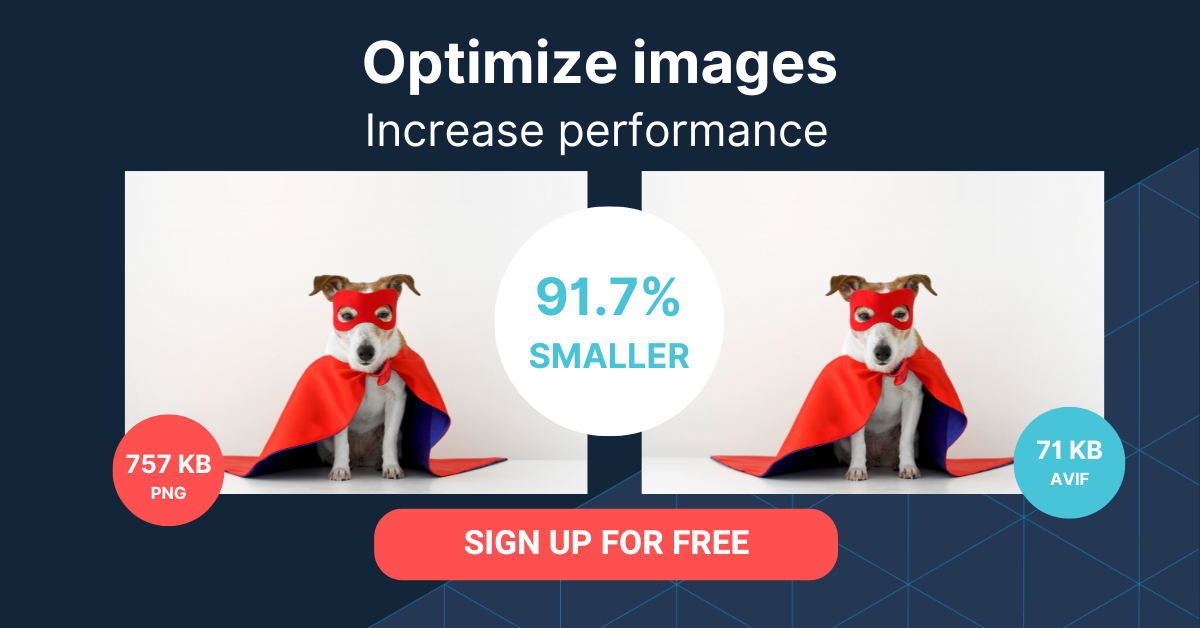
Cloudinary is a visual media platform used to upload, store, manage, transform, and deliver images and videos for websites and applications. The platform also offers a vast collection of software development kits (SDKs) for front-end frameworks and libraries.
Use Cloudinary to organize your media assets and automatically generate optimized assets with unique links. You can also resize an image with React Native.
To use Cloudinary in your application, you need to create an account. Signup is completely free.
Image sourcing and uploading to Cloudinary
Next, you will use the same set of images used above.
- https://images.unsplash.com/photo-1492144534655-ae79c964c9d7?ixlib=rb-1.2.1&ixid=MnwxMjA3fDB8MHxwaG90by1wYWdlfHx8fGVufDB8fHx8&auto=format&fit=crop&w=983&q=80
- https://images.unsplash.com/photo-1494976388531-d1058494cdd8?ixlib=rb-1.2.1&ixid=MnwxMjA3fDB8MHxwaG90by1wYWdlfHx8fGVufDB8fHx8&auto=format&fit=crop&w=870&q=80
- https://images.unsplash.com/photo-1583121274602-3e2820c69888?ixlib=rb-1.2.1&ixid=MnwxMjA3fDB8MHxwaG90by1wYWdlfHx8fGVufDB8fHx8&auto=format&fit=crop&w=870&q=80
- https://images.unsplash.com/photo-1503376780353-7e6692767b70?ixlib=rb-1.2.1&ixid=MnwxMjA3fDB8MHxwaG90by1wYWdlfHx8fGVufDB8fHx8&auto=format&fit=crop&w=870&q=80
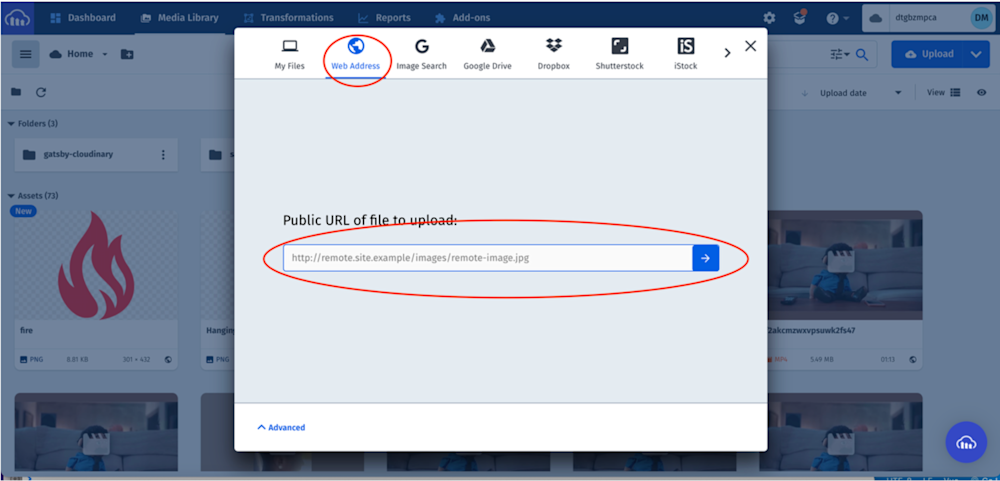
In your Cloudinary dashboard, you upload the images by clicking on the Media Library tab, clicking on Upload, selecting the Web Address option, inputting the url, and clicking on the Arrow Button to upload.
PS: Cloudinary provides multiple sources of uploading media assets.
After uploading the image, we will see it displayed on the console with its unique link. We can copy the link by clicking on the link icon highlighted below:
To use the optimized images from Cloudinary/ the resize image with React Native, you can modify App.js, as shown below:
https://gist.github.com/Mr-Malomz/877029954d581ba2af36baf47caa8775
Conclusion
Now that you’ve seen how easy it is for Cloudinary to resize an image with React Native and automatically generate optimized images, it’s time to put it into use on your own website and/or application. Cloudinary also offers advanced media functionality like filtering, cropping, resizing, retouching, and more. Try it out (it’s free forever!) and unleash the full potential of your digital media.
More from Cloudinary